


Why do a soil test anyway?
It’s easy to do, but what’s the point?
- Your plants are looking sad – pale, dying leaves, yellow spots, stunted growth. If you’re having one of these problems you may have a nutrient deficiency, in that case testing is a good first step. There can be other reasons for nutrient deficiency – for example irregular watering of tomatoes can end up with them not getting enough calcium, but you wouldn’t know the culprit unless you tested the soil to see what was really going on.
- It’s not a bad idea to do a yearly test just to see where you stand. I tested my home made compost I use at the plant nursery & found it was deficient in Nitrogen & Potassium – not good!
How to test your soil
There are a few different ways to test your growing medium, you can send it off to the RHS or a professional testing company for anything from £30-£50, you can buy all sorts of probes which you stick in to the ground, or you can get a test kit from the internet which is my preferred method, although you would get more detailed & accurate results from sending it away.
I go for home testing for ease & cheapness. I think this cost me about £20 a few years ago, they come with quite a few capsules (you use one per test) & you can order extras if you need them.
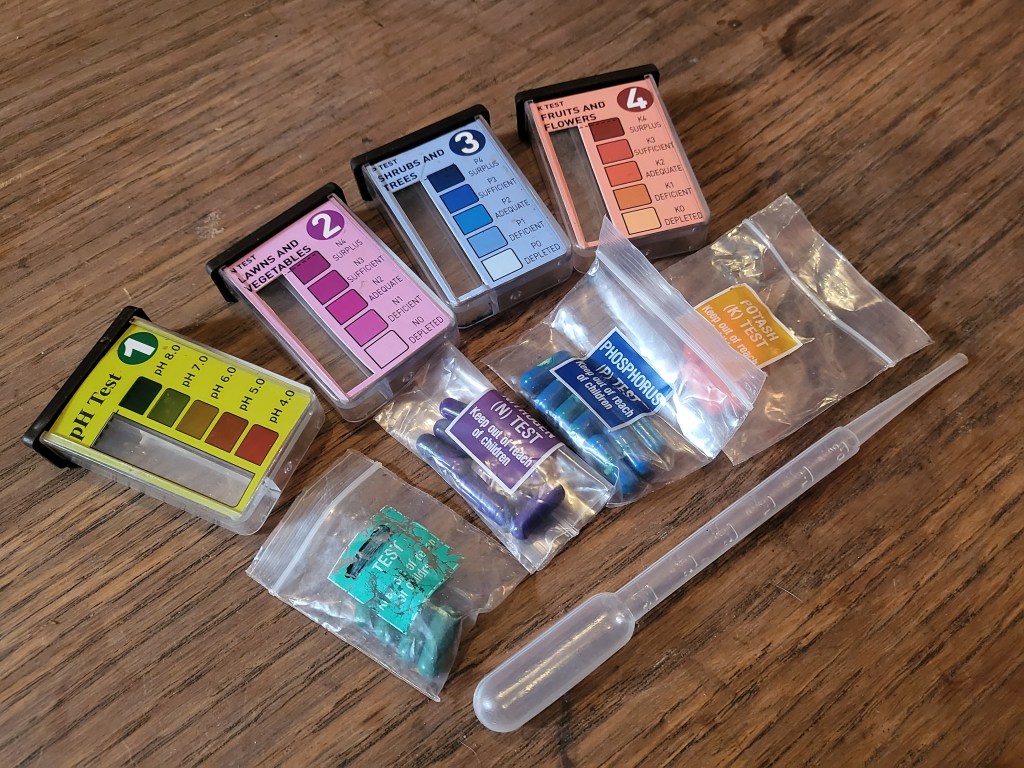
Testing method with a home kit
Using one of these home tests is really simple,
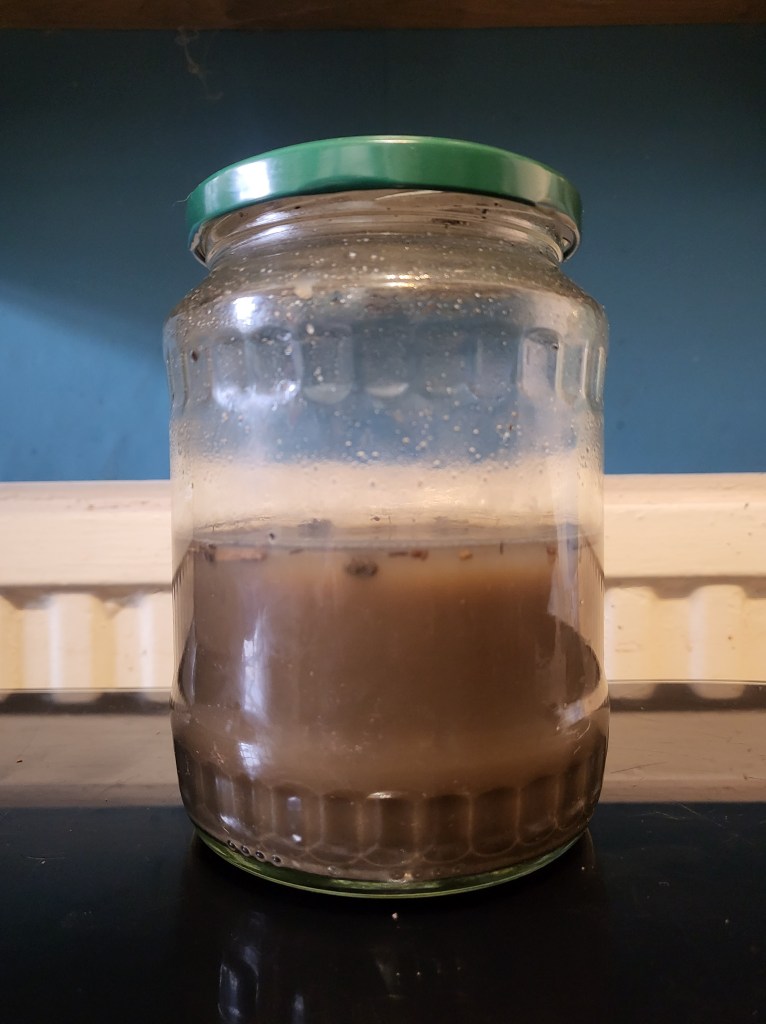
1. Gather some compost or soil – if you’re testing garden soil it’s best to take samples from a few different spots because even a small garden can very quite a lot.
2. Shake it up with some water (my kit specifies a 1:5 ratio) & wait for it to settle – this can take up to 24 hours.
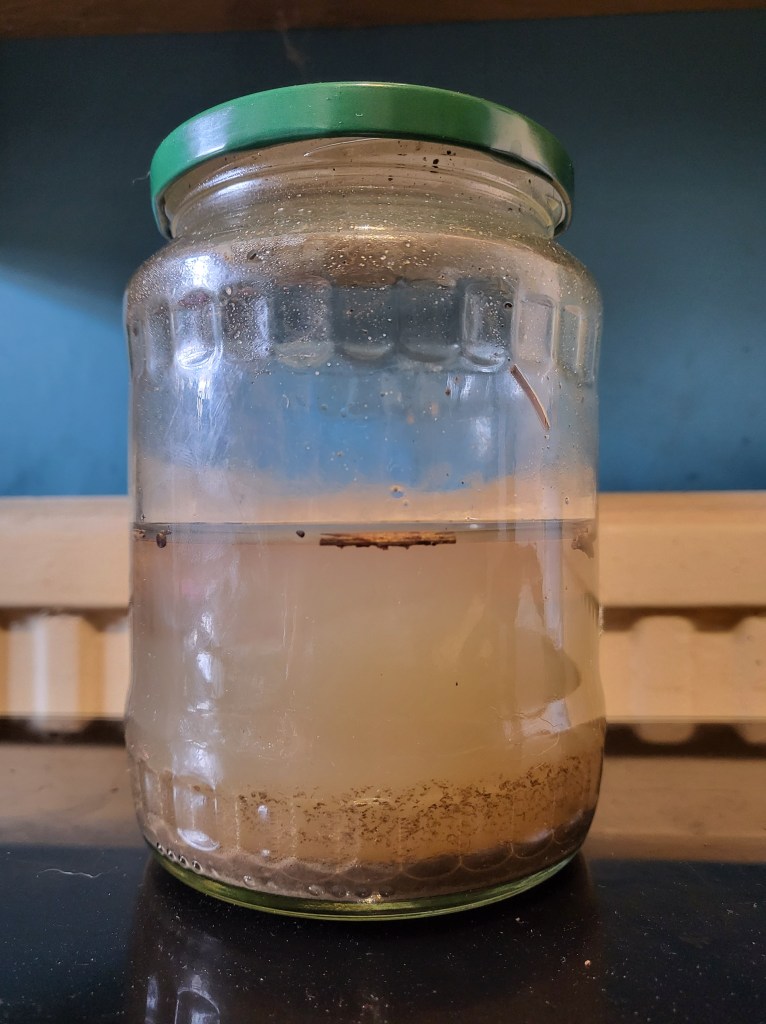
3. Take some of the clean water & put it in to the testing container with the contents of one of the capsules. Then wait a few minutes.
You get your result by comparing the colour of your test water to a guide, much like testing with litmus paper in GCSE science. The results of your test will give you the amounts of the 3 main nutrients – Nitrogen (N), Phosphorous (P), and Potassium (K), as well as the Ph of your soil.
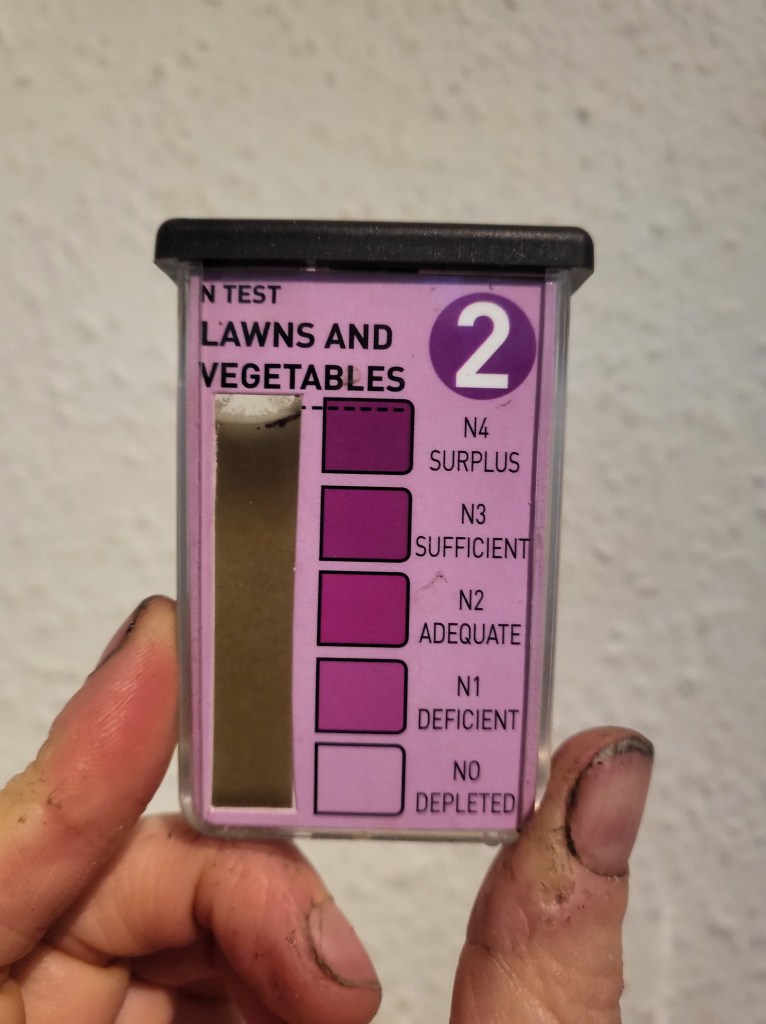
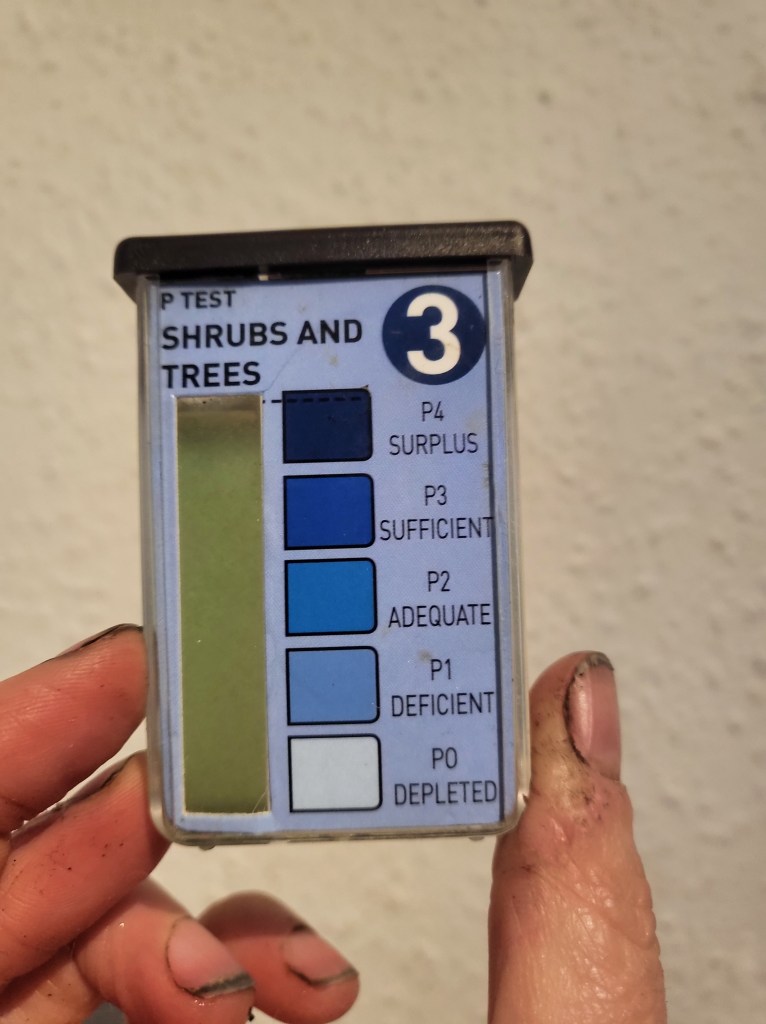
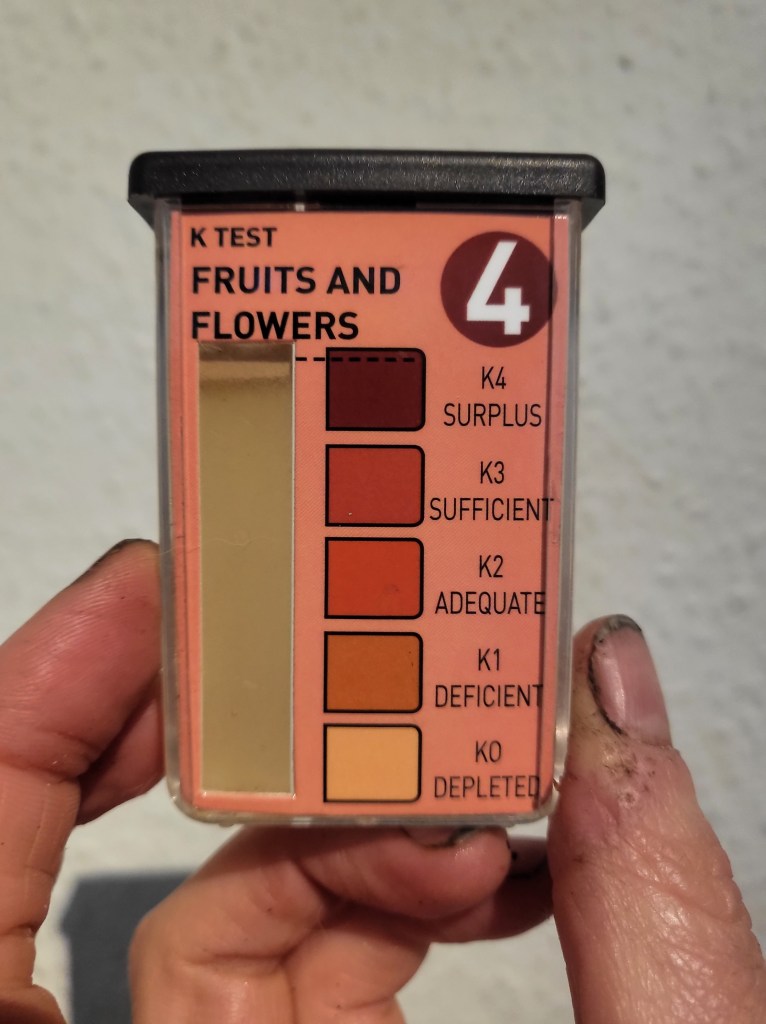
This test is one I did for a customer’s garden. As you can see it’s not an exact science, but I read these as sufficient in Nitrogen, & deficient in Phosphorus & Potassium.
How to amend your soil based on your test results
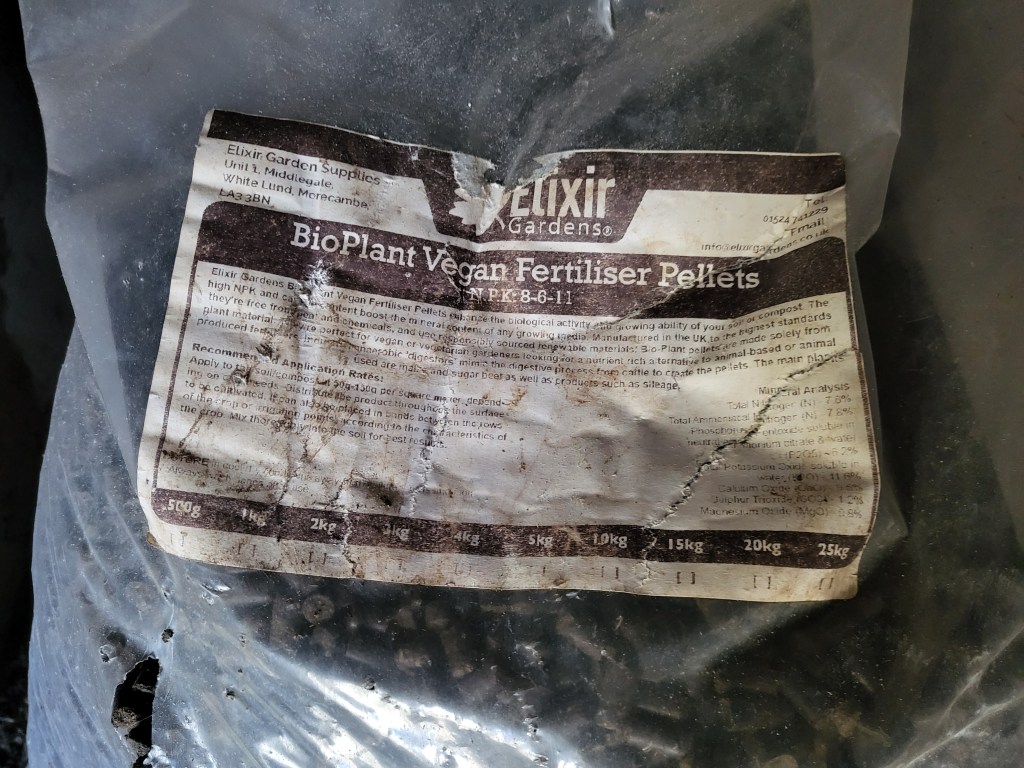
Armed with your test results, now it’s time to hit the internet & look for some fertiliser that will rebalance things. Check the back of any box of fertiliser & you’ll see three nutrients displayed along with the amounts contained inside in percentages. I bought this bag of slow release fertiliser to balance out my compost & you can see it’s high in N & K, thus solving my deficiency problem.
There are a million different inputs you can get & it can become quite bewildering. You may want to buy something off the shelf, maybe you’re friends with your local riding school & can score some sweet free manure, either way, you can trust the numbers! Whatever decisions you make, your NPK will not lie to you.
If your soil is just a bit low in a particular nutrient you can go for low numbers in the 5-15 range. If it’s very depleted you can go for something with higher numbers, or add lots of something with low amounts.
If you’re wanting to add something really organic that you got from a farm or harvested yourself & thus don’t have a package to check, you can find a great list of organic NPK numbers here: https://www.thenutrientcompany.com/organic-npk-values
Tailoring fertiliser to specific plants
It’s worth doing a little research on what your specific plant likes to eat as well. The basics will be the same, but some plants are heavy feeders, such as tomatoes & most other fruiting plants, & some really don’t like too much, such as lavender or wild flowers.
In the case of heavy feeders you’ll probably want to give them some regular liquid plant food as well as making sure they have nutritious soil, and for the light feeders, if you do need to amend the soil you should look for a fertiliser with low NPK numbers, something in the 1-10 range.
You can find a lot of great information about specific plants’ needs from breeders’ culture sheets, like these ones from Syngenta Flowers. They give fertiliser amounts in parts per million (ppm) which can be confusing if you’re amending soil – but in general 50-100 is a light feed, 100-150 is moderate & 150+ is for the heavy feeders.
Broadly speaking, different nutrients are used by the plant at different times in its lifecycle. Nitrogen is helpful for foliage growth, phosphorus for a good root system & general heath, & potassium is used largely in flower or fruit production. So you might want to consider that when choosing fertiliser as well.
Have a look at this label from a bottle of Tomorite:
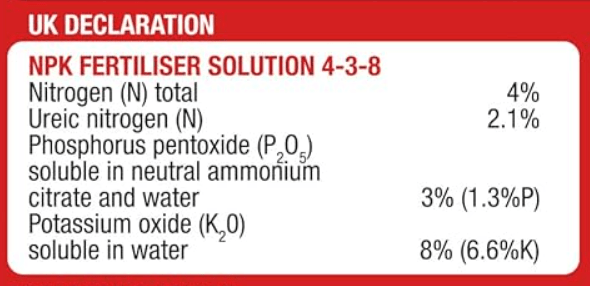
It’s a bit higher in potassium, because that’s what helps with growing the tomatoes. Tomatoes still need the other nutrients as they’re still growing leaves & roots all the time, but this will give them a boost right when they go in to fruit production.
A note on soil pH
Your soil should fall in the 6-7 pH range for the majority of plants. This is unlikely to be a problem in bought compost, but if you’re planting in the ground it’s really worth taking note of.
Some plants are ericaceous, meaning they like more acid conditions, & you can buy special ericaceous compost which caters to their tastes.
If your soil is far out of the right range for your plant, it might suffer from what’s known at nutrient lockout – the nutrients can be there in the soil but the plant can’t absorb them because the pH is out of whack & the various chemicals aren’t playing nicely together. This is also why you may have seen citrus on the list of banned items for home composting – they can acidify the compost thus locking out nutrients for many plants.
If your pH is out of the sweet spot you can amend the soil to change the pH by adding lime if you need to raise it, or sulphur to lower.

So I hope this has encouraged you to have a go at testing your own soil. Knowledge is power & without this simple piece of knowledge you could be adding unnecessary inputs or neglecting your soil without even realising it.
Let me know in the comments if you’ve have a go & what secrets you unveiled!
Sign up to my email list for more fun digging around in the mud!


Leave a comment